The SmallStep client installation on Windows can be done in different ways depending on the environment you want to use to work and activate connections to the machines:
- using package manager scoop on PowerShell
- using Windows Subsystem for Linux (WSL) with a Linux distribution installed from Microsoft Store
Windows PowerShell
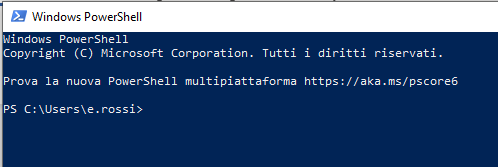
Open the PowerShell, and the window as shown below appears
Then type the following commands in the PowerShell window:
- Download and install scoop
- Test scoop:
- Install git support for scoop
- Install smallstep
scoop bucket add smallstep https://github.com/smallstep/scoop-bucket.git
scoop install smallstep/step
- Verify smallstep
Configuration of the step client
Initialize the client with the command:
step ca bootstrap --ca-url=https://sshproxy.hpc.cineca.it --fingerprint 2ae1543202304d3f434bdc1a2c92eff2cd2b02110206ef06317e70c1c1735ecd
If everything is fine the following messagg will compare on the shell:

Activation of the ssh-agent
On the system windows 10/11 the ssh-agent is active by default. You can verify it with the command:
Get-Service -Name ssh-agent
and the output on the PowerShell will be:

If the service is not in "running status" it can be activated with:
Start-Service -Name ssh-agent
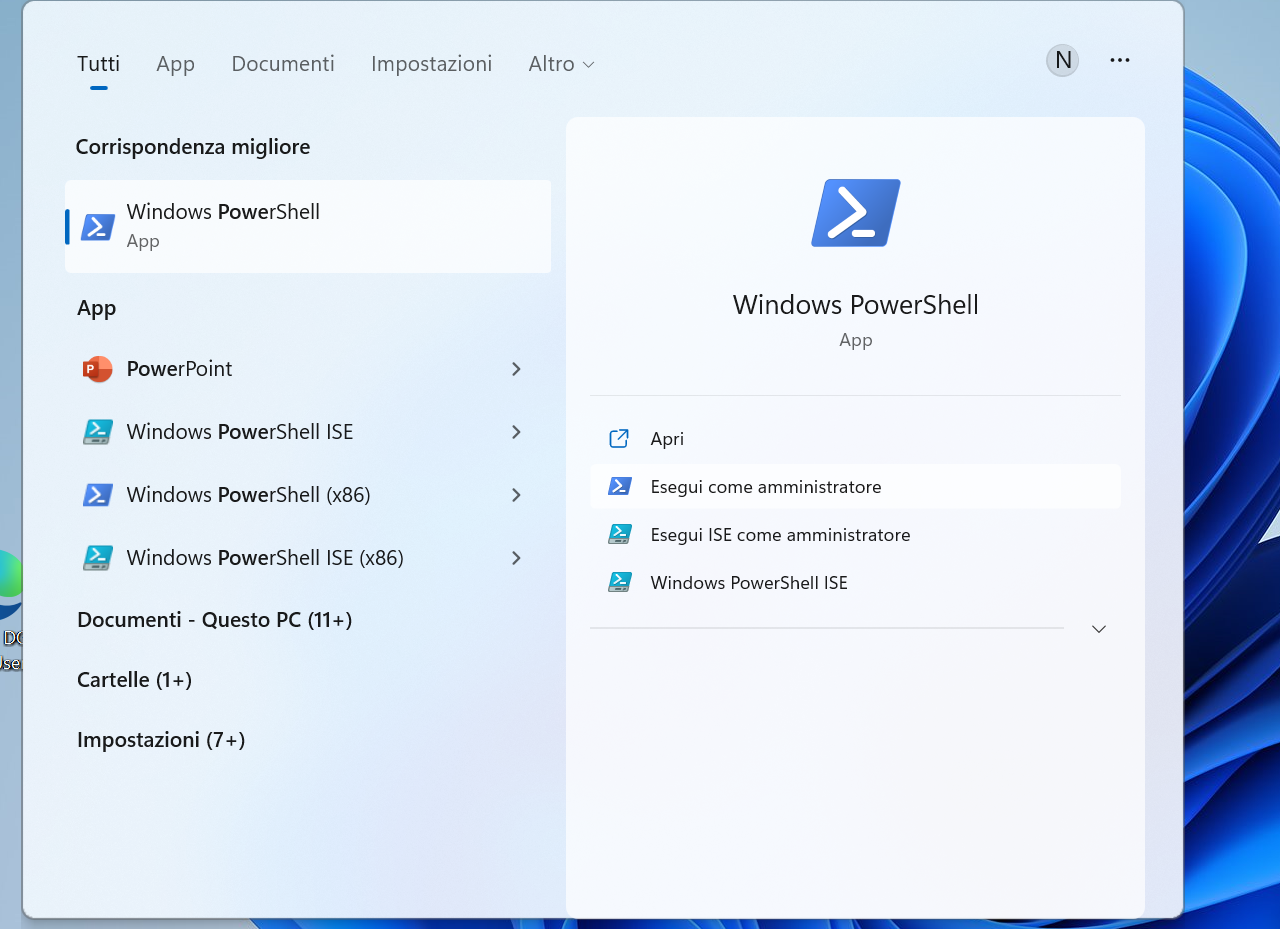
If is still not working , it is necessary to open the PowerShell as admin:
and execute the following commands:
$ Set-Service -Name ssh-agent -StartupType Auto
$ Start-Service ssh-agent
Subsequent use
Run the following command to get the timed certificate:
step ssh login <your-email> --provisioner cineca-hpc
Enter your HPC credentials in the web interface window/tab that opened.
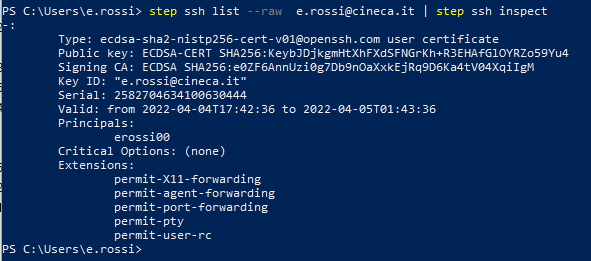
To view the issued certificate and its validity status:
step ssh list

step ssh list --raw <user_email> | step ssh inspect
Now you can login to the cluster.
Windows Subsystem Linux (WSL)
It is necessary to open a shell and install step following exactly the installation instructions for the linux environment.
Please note that WSL doesn't support separate tabs, and if you open a new window, this by default doesn't see the step certificate already issued from the previous tab. To avoid creating a new timed certificate for each session, we suggest to implement in your .bashrc an automatic verification of the created certificate based on the variables initialized by the "eval $(ssh-agent)" command, that can be redirected in an appropriate text file. For example:
if [ -f ~/.bash_agent ]; then
. ~/.bash_agent
fi
steptest=$(step ssh list --raw '<user-email>'| step ssh inspect | grep "Valid")
if [ -z "$steptest" ]
then
eval $(ssh-agent)
echo "export SSH_AUTH_SOCK=$SSH_AUTH_SOCK" > ~/.bash_agent
echo "export SSH_AGENT_PID=$SSH_AGENT_PID" >> ~/.bash_agent
step ssh login '<user-email>' --provisioner cineca-hpc
fi
Windows SSH/SFTP Clients
There are many SSH or SFTP Clients available for Windows, that are of common usage but are not automatically configured for working with the new 2FA system. It is although possible to login with them by exploiting the OpenSSH agent forwarding that can be set by taking advantage of another tool installable on Powershell, that is WinSSH-Pageant.
The procedure is as follows:
- Follow the setup of the Two-factor authentication for Powershell as documented in our Userguide, up to and including paragraph “Activation of the ssh-agent";
- Download WinSSH-Pageant by executing the following command in Powershell:
- You should find a new executable in this path:
C:\Users\$Env:UserName\AppData\Local\Programs\WinSSH-Pageant\winssh-pageant.exe
the only difference is in $Env:UserName, that is specific to your workstation.
In principle this command has to be launched with its full path, but you may want to setup an easier way to access it. The most simple way would be to create an alias:
Keep in mind though that Powershell keeps an alias alive only until the shell is closed. An easy permanent solution would be to copy the program winssh-pageant.exe to another folder, for example C:\Users\$Env:UserName\scoop\shims that has been already included permanently in the PATH variable by the previous installation of step and is therefore recognized by Powershell without the need of expliciting the full path.
- From Powershell, launch the WinSSH-pageant with this command:
(assuming that you have estabilished a shortcut, otherwise use the full path as mentioned previously)
It is possible to check if the previous command worked and a WinSSH-pageant process is active, with the command:
The expected output is as in this screenshot:

Now, everytime you need to create a new certificate you can use the typical step command from Powershell:
step ssh login <your-email> --provisioner cineca-hpc
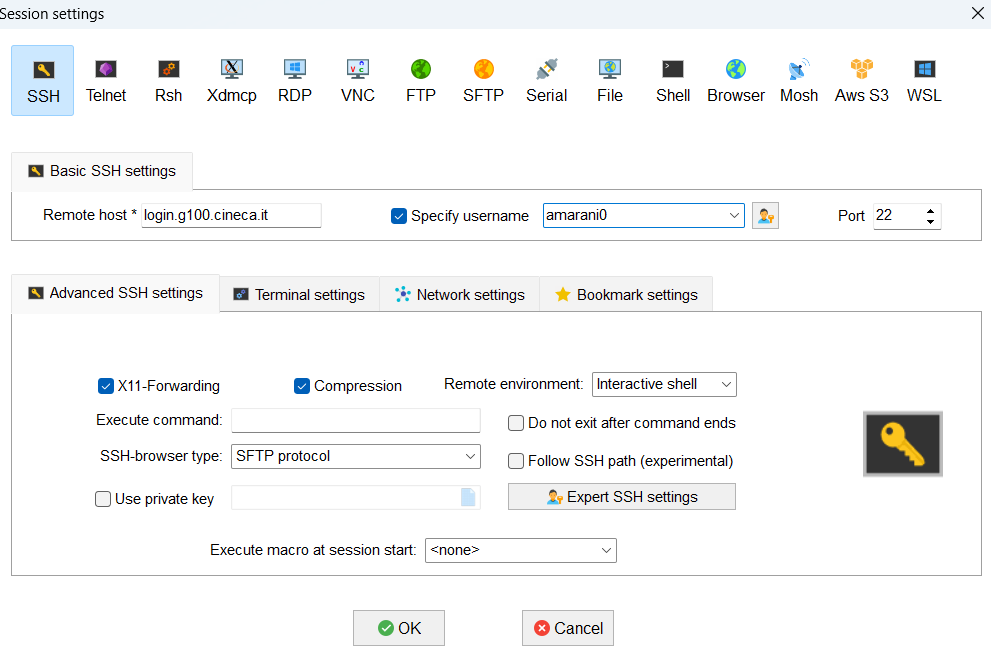
And at this point you can connect with a SSH/SFTP client opening a session with a specific configuration, that usually can be saved for subsequent uses.
The method has been tested with the following clients:
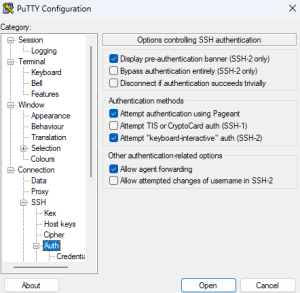
Putty:
In the login window, check the category “Connection --> SSH --> Auth” and be sure that the boxes “Attempt authentication using Pageant” and “Allow agent forwarding” are ticked.
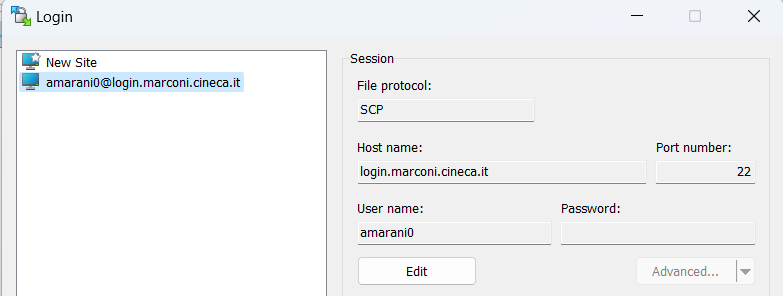
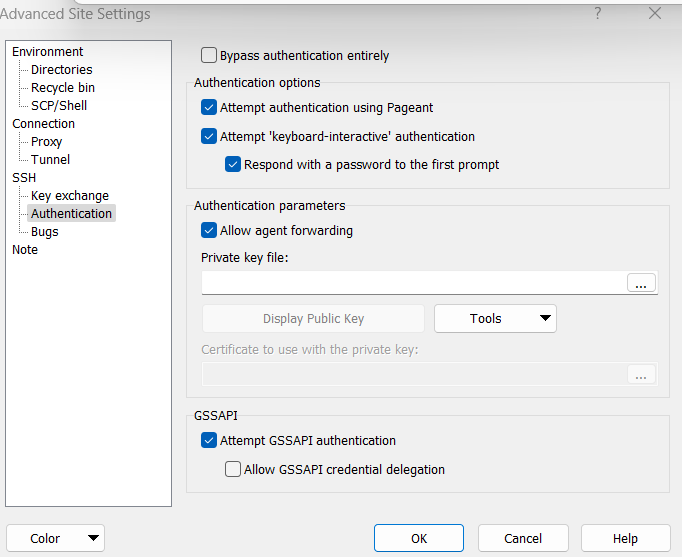
WinSCP:
In the login window, from the Advanced settings go to “SSH--> Authentication” and tick the boxes “Attempt authentication using Pageant” and “Allow agent forwarding”. Be sure that the file protocol is set to “SCP”.
Note: It is possible that if you try to edit an already saved site, the ssh-agent won’t be recognized. If this is the case, we recommend to create a new site from scratch and configure it accordingly. The new site can then be saved and will keep working.
Note: In certain cases, we noted that the procedure may not work at first try, and you will get an error at login even if everything is in order. In most cases, a simple reboot of your workstation solves the problem and the issue will not occur again.
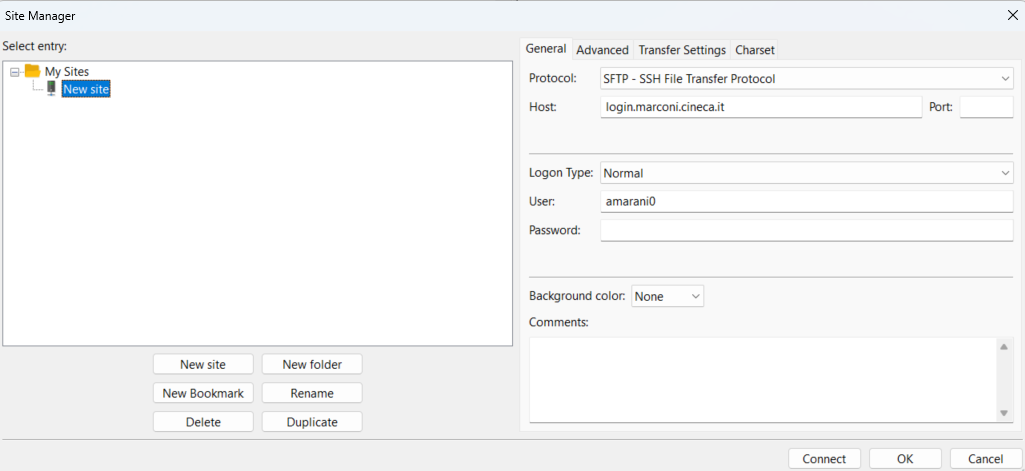
Filezilla:
In your site configuration, be sure that the Protocol is set to “SFTP - SSH File Transfer Protocol” and the Logon type is set to “Normal”.
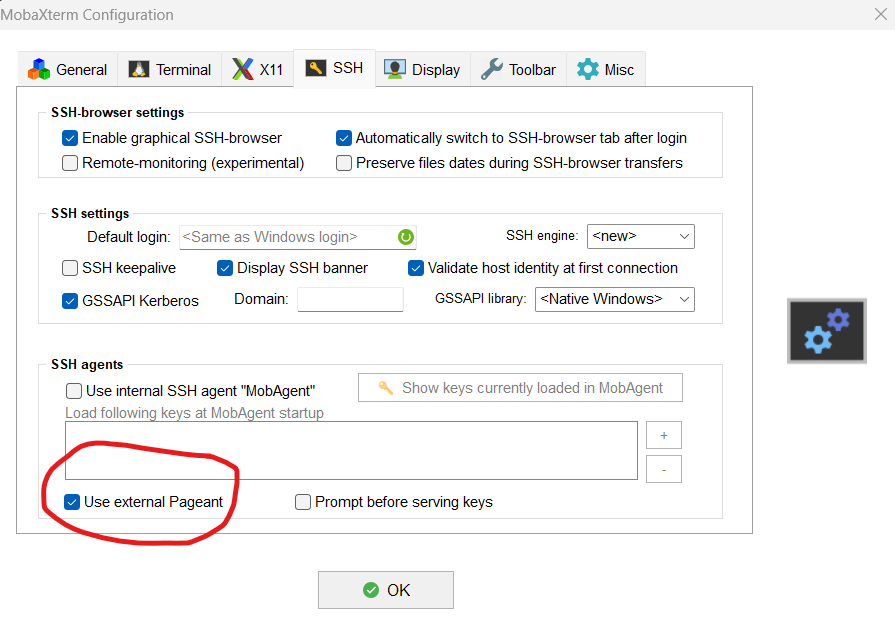
MobaXTerm:
In the upper menu bar with the general options, make sure that in "Settings" → "Configuration" → "SSH" the box "Use external Pageant" is ticked (it should be by default).
After that, opening a simple ssh session should do.
Other SSH/SFTP clients don’t seem to be working with this method and are currently not supported by CINECA (for example BitviseSSH), or haven’t been tested yet. We will keep updating the Userguide when other clients will be proven compatible.